Installing a certificate on a machine can be done by running a CER file or by importing a PFX file.
.
1. Install CER File
To install a certificate with a CER file implemented in a MSI, the Microsoft tool “certmgr” (Certificate Manager Tool), included in Windows must be used.
- First snapshot
- Create a folder and copy the files certmgr.exe and certname.cer in this folder
- Perform any additional action needed for the package
- Second snapshot
- Create a custom action in the Wise project allowing to run the installation command of the certificate in user context
.
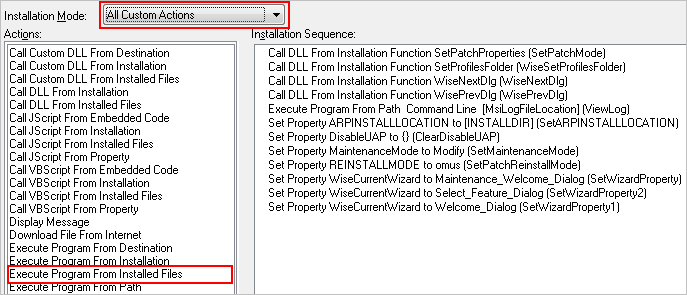
To create the custom action:
- Go to the MSI Script menu
- Select the Installation Mode: All Custom Actions
- Run the action Execute Program from installed files

.
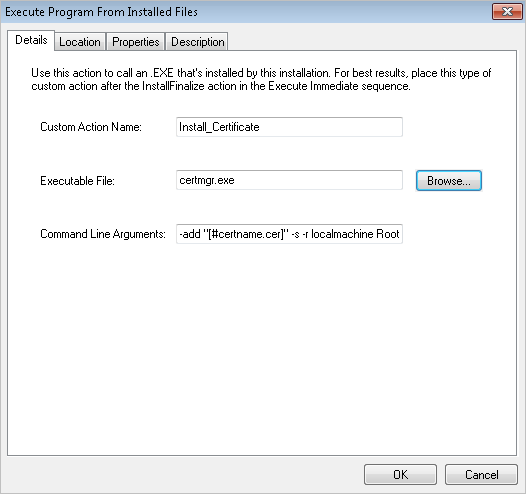
Details
Enter the name of the custom action
Executable File: Browse the location of certmgr
Command Line arguments:
-add “[#certname.cer]” -s -r localmachine Root
or
-add “[C:\installdir\certname.cer]” -s -r localmachine Root
For the name of the certificate in the command line, you can use either the name of the file in the Wise project (for example here #certname) or the path of the file (“C:\installdir\certname.cer” for example).
.
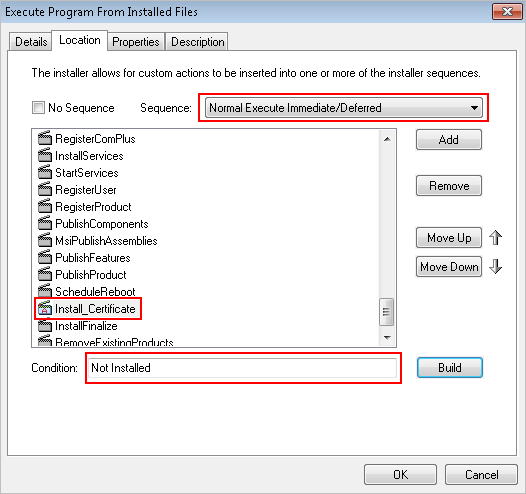
Location
Select the sequence Normal Execute Immediate/Deferred
Add the custom action before InstallFinalize
Condition : NOT Installed
The condition “Not Installed” forces the custom action to be run only when installing.
.
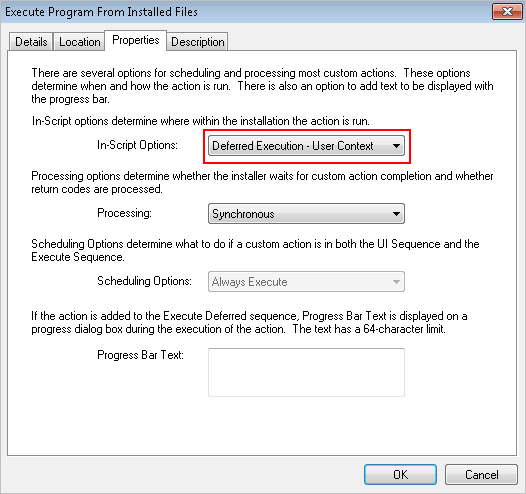
Properties
In-Script Options: Deferred Execution – User Context
This parameter forces the custom action to be executed in user context.
Indeed, installing a certificate needs to be done in user context
.
.
2. Import PFX File
Certificates can also be imported using PFX files.
Generally, a password is needed to install this kind of certificate.
To import a certificate within a PFX file, use the Microsoft utility certutil (downloadable on Microsoft website).
- First snapshot
- Create a folder and copy the files certutil.exe, certadm.dll and certname.pfx in this folder
- Perform any additional action needed for the package
- Second snapshot
- Create a custom action in the Wise project allowing to run the installation command of the certificate in user context
.
To create the custom action:
- Go to the MSI Script menu
- Select the Installation Mode: All Custom Actions
- Run the action Execute Program from installed files
.
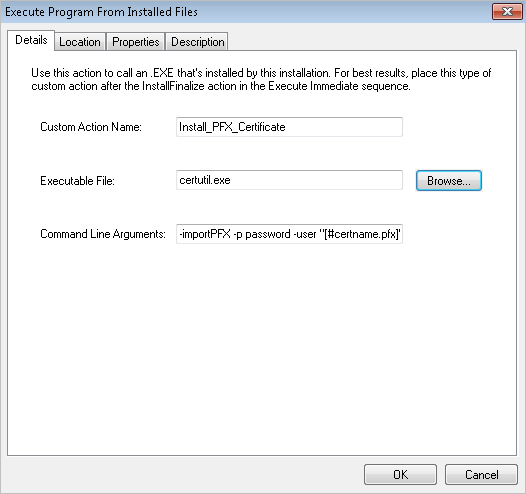
Details
Enter the name of the custom action
Executable File: Browse the location of certutil
Command Line arguments:
-importPFX -p password -user “[#certname.pfx]”
Or
-importPFX -p password -user “[ C:\installdir\certname.pfx]”
For the name of the certificate in the command line, you can use either the name of the file in the Wise project (for example here #certname.pfx) or the path of the file (“C:\installdir\certname.pfx” for example).
.
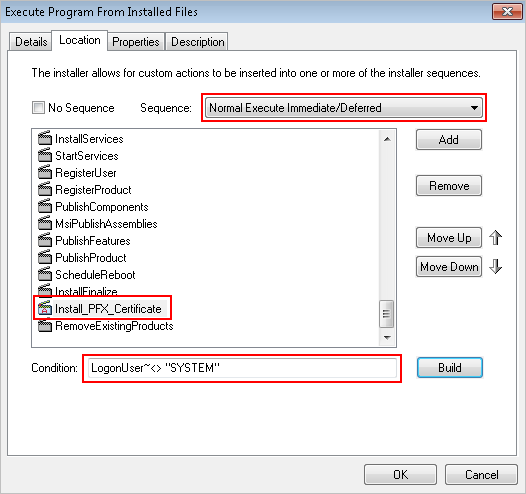
Location
Select the sequence Normal Execute Immediate/Deferred
Add the custom action after InstallFinalize
Condition: LogonUser~<> “SYSTEM”
The condition forces the custom action to be executed only in user context.
.
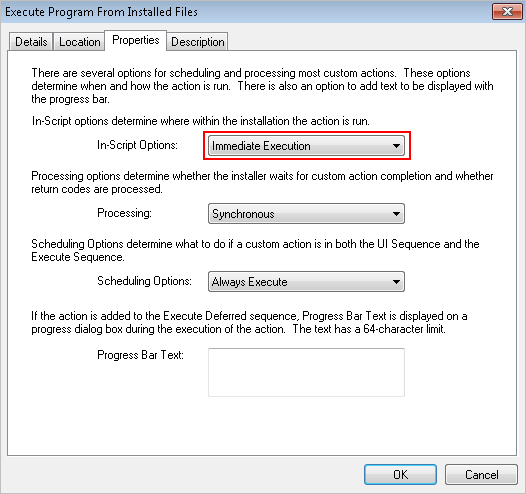
Properties
In-Script Options: Immediate Execution
.
Active Setup
This custom action will be executed only in user context, so we have to set an Active Setup.
Set the Active Setup by adding the following registry entries in the Wise project:
Windows Registry Editor Version 5.00

[HKEY_LOCAL_MACHINE\SOFTWARE\Microsoft\Active Setup\Installed Components\certname]

"ComponentID"="certname"
"StubPath"="msiexec /fpu [ProductCode] /qn"
"Version"="1"