1. Pre-requisites
Creating a MSI file using the Snapshot Capture feature of Wise Package Studio requires a clean machine to ensure all the components are captured (a component will not be captured if already present on the machine).
To avoid pollution as much as possible, deactivate all components running in background (Defender, Windows Updates, SCCM Agent…).
Some application need pre-required component to be installed first (C++ libraries, .Net Framework…)
Install all the pre-required components (to capture the application only).
Install Wise Package Studio.
If the packaging machine is a VM, shutdown the machine and create a snapshot.
.
.
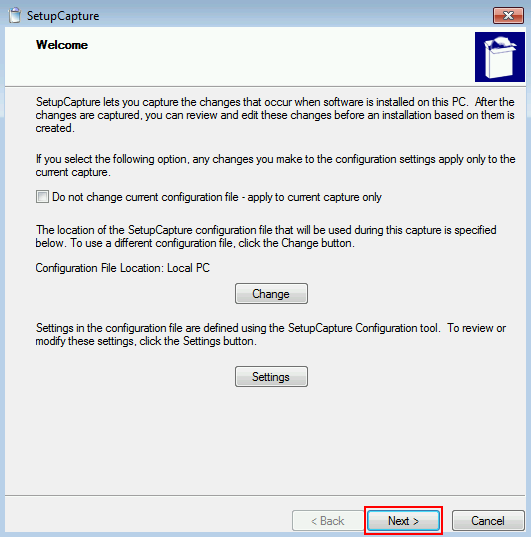
2. Snapshot Capture
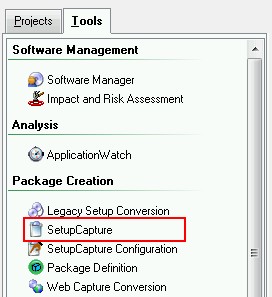
Launch Wise Package Studio.
Select the tool SetupCapture
.
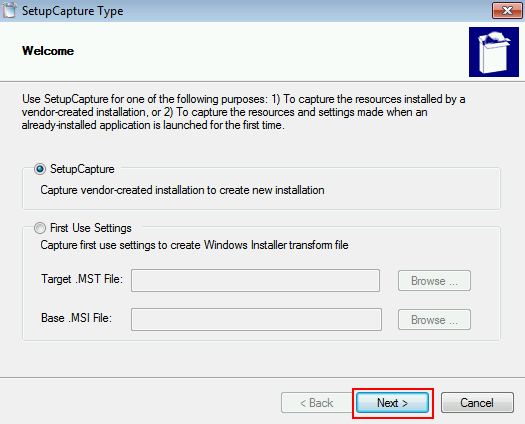
Next
.
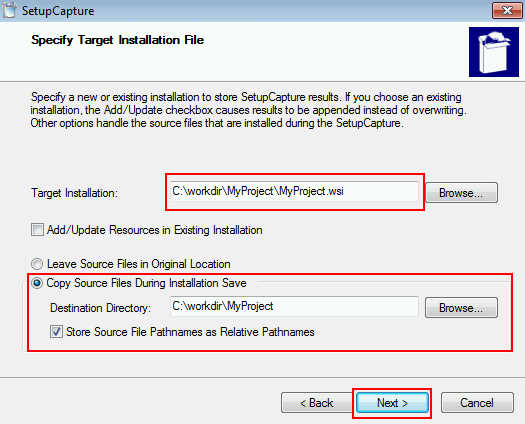
Target Installation: Browse the location of the future project file (.wsi) and name it
Select “Copy Source Files During Installation Save”
Destination Directory: Browse the location of the project
Select “Store Source File Pathnames as Relative Pathnames”
Next
.
Next
.

Next
.
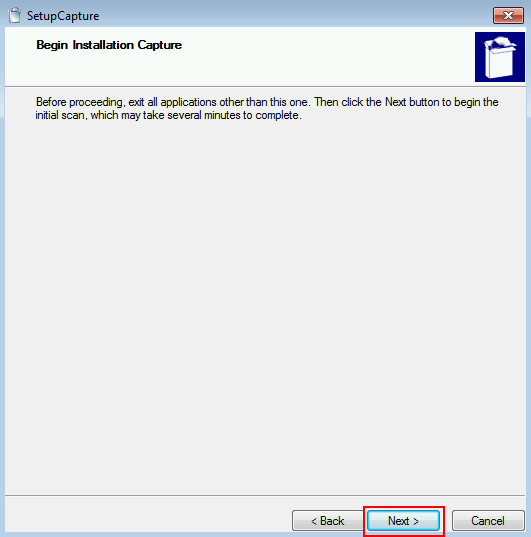
Click Next to launch the first capture
.

1st capture in progress…
.
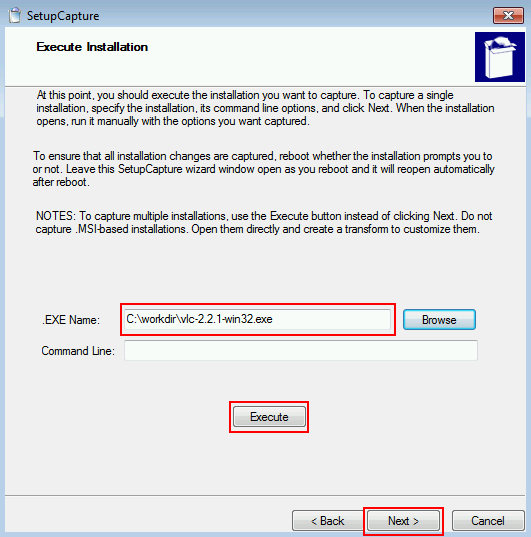
Once the 1st capture completed:
Browse the setup file of the software to package and click Execute
Install the software…
Once the software installed and configured, click Next to launch the 2nd capture
.

Once the 2nd capture completed, click Next
Wise compare the 2 snapshots and displays the result
.
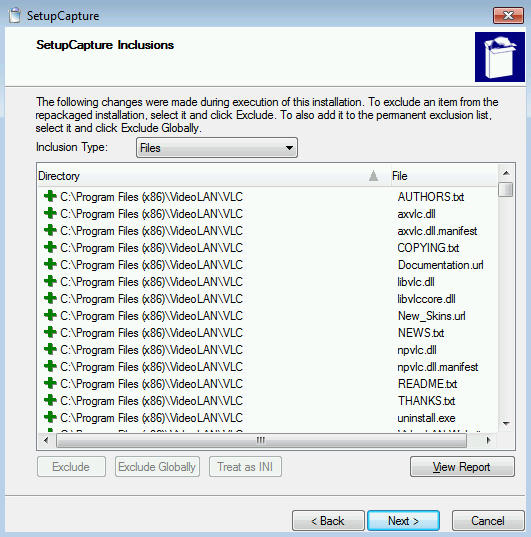
Check the files displayed and exclude unwanted ones.
To the same for registry, ini and shortcuts
Then click Next
.
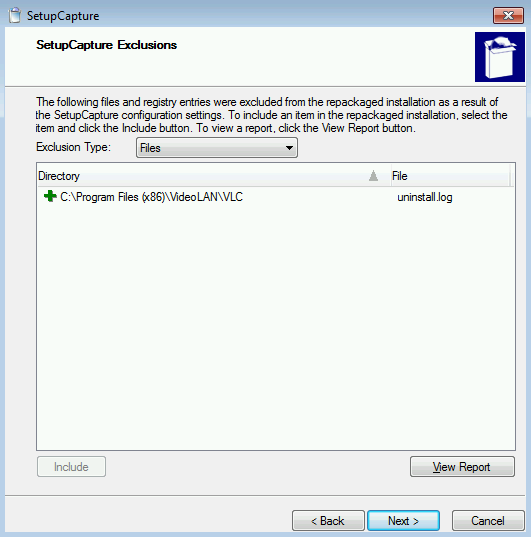
The excluded files are now displayed.
Check them and include some of them if necessary.
Do the same for registry, ini and shortcuts
Then click Next
.
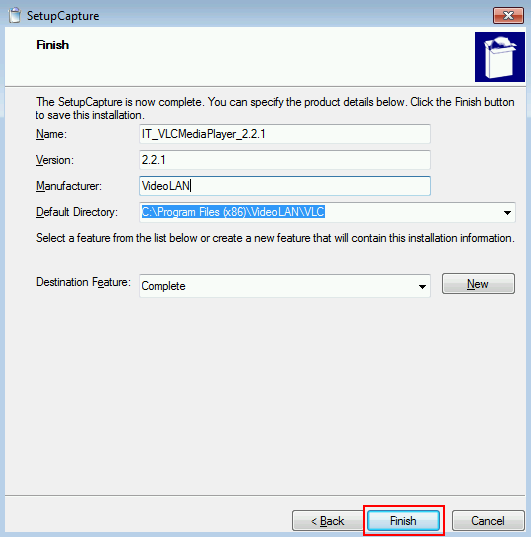
Type the name (will set the ProductName MSI property)
Type the version and the Manufacturer
Click Finish
.
.
3. Personalization
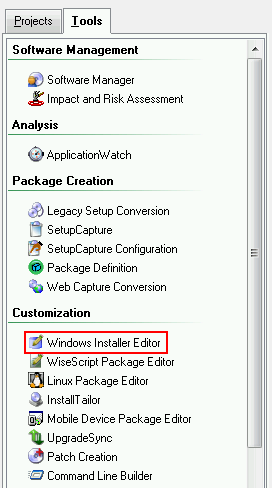
Now launch the tool Windows Installer Editor
.
Windows Installer Editor allows to modifiy the package.
3 tools can be used:
- Installation Expert: Allows to manage files, registry, ini, environment variables with a GUI
- MSI Script: Allows to manage Custom Actions
- Setup Editor: Allows to manage features, properties, tables (like Orca would do)
![]()
.
By default, packages is configured “Per-User Installation”.
Most of time, a package must be configured “Per-Machine Installation”
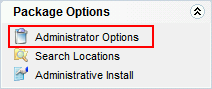
In Installation Expert, select “Administrator Options”
.
 .
.

Install for Profile: Per-machine installation
.
4. Compilation
Once ready, the package can be compiled into a MSI file.
Click the “Compile” button to generate the MSI file.
.
![]()
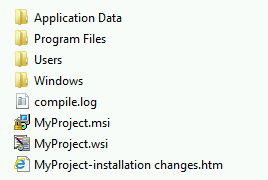
The MSI file is created in the project folder and is ready to be deployed.
.